Where to Start Landscaping a New House
Learn where to start landscaping a new house: check drainage, map your whole yard, budget in phases, and time soil work, trees, beds, and lawn to avoid rework.
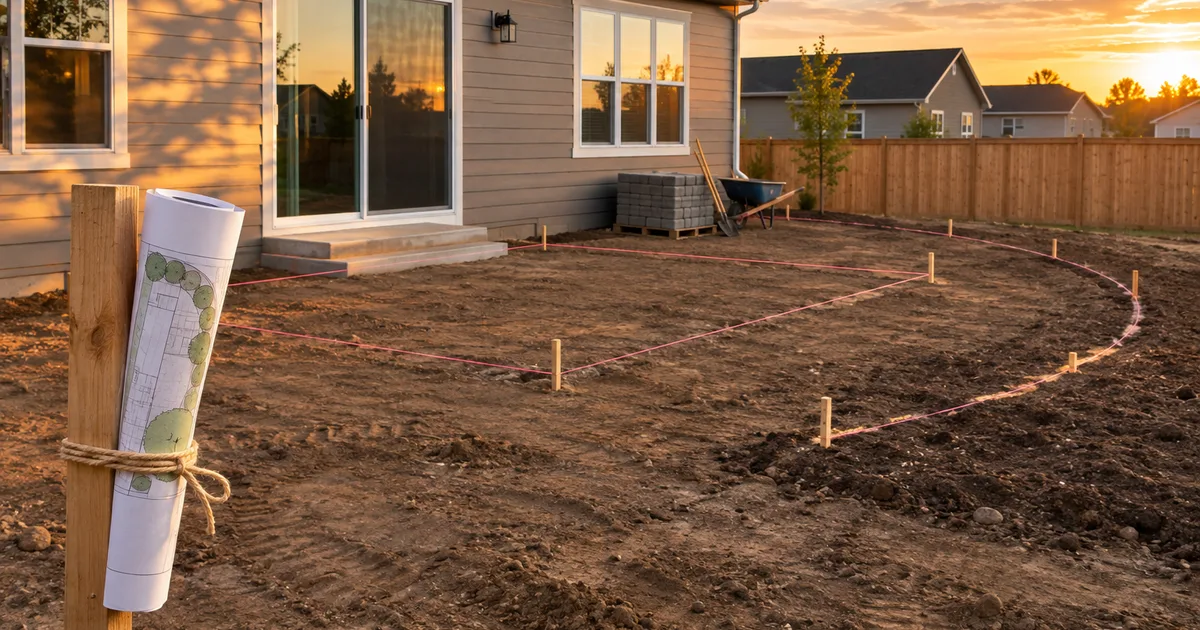
You move in during spring, picture a patio outside the back door, and then the first storm leaves a pond where you wanted chairs. If you're wondering where to start landscaping a new house, begin by recording how the yard works. Check water, property restrictions, and future construction access before buying plants. Then make a whole-yard plan and build it in an order that keeps finished work from being dug up.
In this article
- Where to start landscaping a new house
- What should you do in the first month?
- Fix water and grade first
- Make a plan for the whole yard before any single project
- Which landscaping order of work makes sense?
- How do you split the plan into phases and budget?
- When should you hire help, and which kind?
- What mistakes cost the most?
- FAQ
Where to start landscaping a new house
Start with a walk around the house and a folder for dated photos, drawings, and approvals. Your first decisions concern what needs protection and what must stay accessible. A wet foundation, an eroding slope, or a blocked drainage route takes priority over a planting bed. New yard landscaping goes best when you do the work in a set order, and this guide gives you that order.
Decide how you'll actually use the yard. You might need a route from the driveway to the shed, a place for children to play, or shade beside the kitchen. Put those uses on paper before choosing materials. A beautiful bed across your everyday walking route will quickly acquire a shortcut through it.
What should you do in the first month?
Spend the first month observing and documenting, without starting discretionary digging. That gives you time to catch problems that a sunny afternoon hides. It doesn't mean leaving active water damage or serious erosion untreated while you wait for more information.
During rain, watch from a safe, sheltered place. Film where water arrives, where it pauses, and where it leaves. Include roof downspout outlets, overflowing gutters, fence openings, and the slopes beyond your property. Date every photo and record what remains wet afterward. A close-up of a puddle is less useful than a wider view showing its route to the house.
On dry days, photograph morning and afternoon shade. Note areas that stay soft, exposed soil that washes away, and vegetation worth keeping. Revisit these observations through the seasons; a month won't show you summer shade or winter runoff.
Read the survey or recorded plat and the easement documents referenced in your closing paperwork. Mark utility and drainage corridors. Check HOA planting deadlines and approval rules, then ask the local permit office about fences, walls, and grade changes. HOA approval doesn't replace a permit or permission from an easement holder.
Before any digging, including tree holes and fence posts, contact 811. The national notification service is free, but advance notice and ticket requirements depend on your state. Wait the required period and confirm that every notified utility has responded. Private lines, such as some outbuilding feeds or irrigation pipes, may need a separately paid locator. Paint marks aren't permission to excavate carelessly.
Fix water and grade first
Check gutter blockage and roof runoff before commissioning trenches. Where safe and locally permitted, remove surface leaves from a street drain using a tool from outside traffic; report deeper blockage to public works. Don't lift grates or enter catch basins.
DOE guidance directs aboveground downspout discharge at least 5 feet from the foundation onto ground sloping away. An extension ending in a hollow that drains back toward the wall won't help. Check the whole route, then address trouble nearest the house before moving outward.
IRC R401.3 uses a soil-grade fall of at least 6 inches within the first 10 feet from the foundation, with drainage alternatives where physical barriers prevent it. Local adoption and amendments control. Don't pile fill against siding or cover required clearances to achieve that number.
Runoff needs an approved destination. Suitable on-site infiltration may work; a storm drain connection or discharge toward a creek requires local review. Sending water into the next yard isn't a fix. Use our backyard drainage solutions guide to compare methods after the route is established. For builder grading and disturbed construction soil, see new-construction landscaping.
Make a plan for the whole yard before any single project
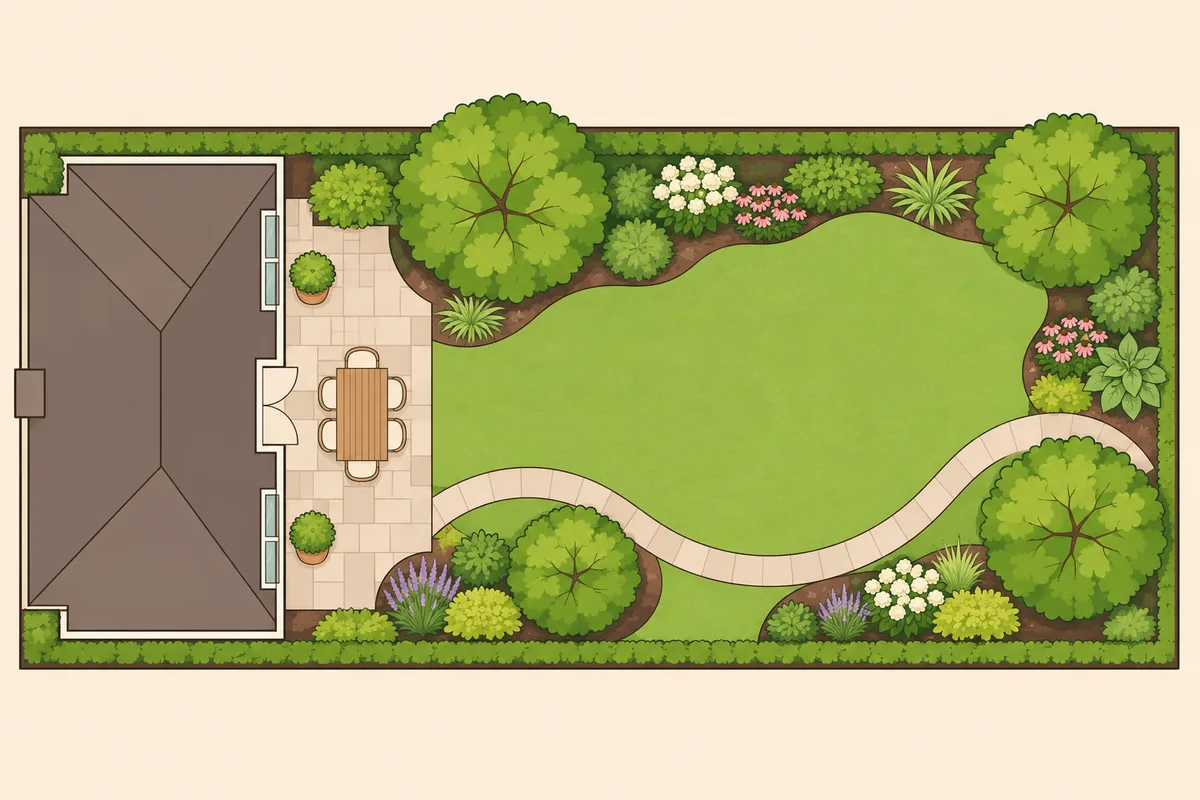
Picture finishing your patio, then discovering that the drain serving the side yard must pass beneath it. The drain now requires demolition or an awkward reroute. A yard plan before you buy plants should also come before you order paving.
Draw the house and lot to scale using measured dimensions and your survey. Paper is enough. Add doors, utilities, easements, existing trees, water routes, and changes in elevation. Overlay the future patio, paths, beds, lawn, and structures. Show how equipment will reach each construction area.
Draw trees and shrubs at mature width. Leave room for maintenance access and utility repairs. A sketch helps coordinate space; it doesn't establish property boundaries, calculate drainage capacity, or supply structural engineering.
Keep one drawing that shows the intended finished yard, even if most of it is years away. Label what will be built in each phase and which routes must remain open. Our landscape design guide for beginners explains the layout process.
To try a design idea on your own yard before you draw, upload a photo to our free AI garden design tool.
Which landscaping order of work makes sense?
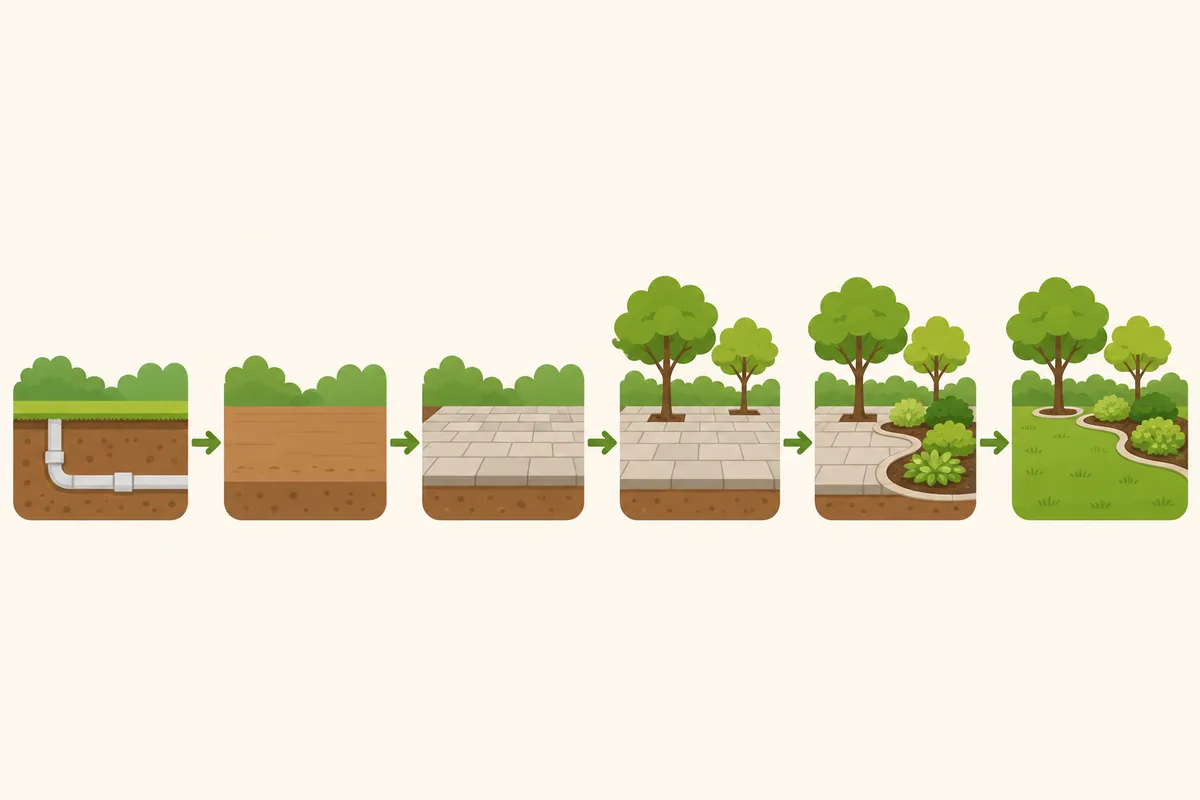
Use the following sequence to avoid paying for work twice. Your contractor may coordinate rough grading and trenching together, but underground crossings must be resolved before paving. Keep machinery and stockpiles out of existing trees' protected root areas.
Underground services and grading
Set drainage elevations and destinations first. Coordinate drains, irrigation sleeves beneath future paths, and any electrical or gas service with the appropriate trades. Photograph and measure buried routes before backfilling. Sleeves preserve a future crossing; they don't substitute for a designed utility installation.
Complete major earthmoving before finished surfaces and planting. Check how the proposed grade meets the house, adjoining lots, and future patio. Leave final soil preparation until heavy traffic is finished so equipment doesn't compact it again.
Retaining walls, structures, and hard surfaces
Build retaining walls and other structures that establish levels before adjacent finished paving. Include wall drainage and any required engineering in the scope; our retaining wall cost guide explains the separate cost drivers. Coordinate fence and deck work while construction access remains available.
Install patios, paths, and driveway work next. Confirm surface drainage and transitions at doors before completion. A finished path should let you reach the garden without walking through prepared beds.
Soil improvement
Test soil before ordering amendments. A fertility test helps with pH and nutrient decisions; it won't establish whether a drainage system will work. For a real cost reference, the University of Minnesota lists its regular lawn and garden test at $22 per sample for 2026, before shipping, with regional interpretation and soil-shipping restrictions.
Prepare the full planting area where practical. Maryland Extension's new-lawn guidance describes mixing amendments through the upper 4 to 6 inches and adding compost when organic matter is low. That is preparation depth, not a universal instruction to buy 6 inches of topsoil. A thin cosmetic layer won't remove compacted subsoil. Avoid working wet soil or tilling through established roots.
Compost can improve suitable depleted soil, but it isn't a drainage repair or an automatic requirement for every native planting. Order material by measured area and specified depth, including delivery and spreading in the quote.
Trees, large shrubs, then beds and perennials
Plant the largest permanent plants once their final grade is settled and machinery no longer needs their space. You can plant a tree early in an unaffected part of the yard if later excavation and access will stay clear.
Match mature size, light, soil moisture, and regional climate. Keep trees clear of buried services and septic areas. Willows deserve particular caution near drains and sewer lines because their roots can interfere with pipes. There isn't one safe distance for every species and pipe; check the utility's clearance rules and get site-specific placement advice.
Fill beds around that permanent structure. Group plants with similar water needs, keeping a drought-tolerant bed separate from frequently watered turf. New plants still need establishment watering. Choose locally appropriate species with our native plant landscape design guide; being native doesn't make a plant suitable for every spot.
Lawn or ground cover, mulch, and lighting
Finish permanent lawn after heavy work. Sod provides quicker cover and can protect erosion-prone soil, but costs more than seed and needs watering and rooting time before play. If children need a usable patch soon, sod a completed area outside future construction routes rather than the whole lot.
Seed suits a lower initial budget when you can protect the area during establishment and wait for the right season. Native ground cover fits places that don't need turf's foot-traffic tolerance, but establishment speed and weed control vary by species. Neither option justifies leaving an unfinished slope bare; arrange temporary stabilization with the site contractor.
Mulch each completed bed promptly. Around new trees, a 2- to 3-inch wood-chip layer can help retain moisture and suppress weeds; keep it away from trunks. Don't fill drainage channels with loose mulch.
Install lighting fixtures after construction, having planned their wiring earlier. Follow DarkSky guidance: shield light downward, use the lowest useful brightness and warm color, and add timers or motion controls. Reduced lighting helps limit disruption to insects; a warm bulb left on all night still has an impact.
How do you split the plan into phases and budget?
For landscaping a new house on a budget, price the whole plan before committing to its first permanent feature. Compare measured quantities, labor, delivery, disposal, approvals, and restoration. Include establishment watering and maintenance. Local quotes determine what you can build.
Here is a hypothetical $30,000 yard budget, not a national average or an estimate for your property. The allocations assume the proposed scope fits local bids. Each phase includes some uncommitted money for surprises.
| Phase | Illustrative allocation | Scope and decision to move on |
|---|---|---|
| Water and grade | $8,000 | Planning, necessary approvals, drainage correction, grading, and temporary soil protection. Verify the route and completed work before covering it. |
| Hardscape and structure | $14,000 | Underground crossings, required structures, and a patio and path sized to the remaining budget. Finish heavy equipment access before planting. |
| Planting | $8,000 | Soil preparation, selected trees, beds, lawn or ground cover, mulch, and restrained lighting. Schedule for local planting conditions. |
Suppose the drainage quote exceeds its allocation. Reduce or postpone the patio before committing its money. If planting bids are high, complete fewer beds while retaining the intended mature spacing. Packing cheap plants closer together creates a removal job later.
A phased landscape plan should leave each stopping point stable and maintainable. Affordable first-year work can include mulching completed beds, protecting unfinished ground with locally suitable temporary cover, and planting a few well-placed trees. Compare delivered bulk compost with bagged material where the soil test supports amendment. Small areas you can water and weed are more manageable than scattered projects across the lot.
When should you hire help, and which kind?
Hire a landscape designer for a coordinated layout and planting plan. Ask whether the fee includes a site visit, measured base drawing, revisions, and installation details. Review landscape designer costs before comparing proposals. A concept drawing may need further technical work before construction.
For water problems, choose a drainage specialist with comparable completed work. Bring in a licensed civil engineer when runoff crosses properties, the outlet is uncertain, or substantial grading affects buildings or downstream land. Structural walls and unstable slopes may require additional engineering. A general contractor's willingness to dig doesn't establish drainage expertise.
Get three written quotes using the same storm video, drawing, and requested scope. Compare the proposed elevations and destination, materials, permits, disposal, restoration, and exclusions. Ask how performance will be checked and who corrects a failure. Design, engineering, and installation fees need separate local quotes; a single package price can hide missing services.
What mistakes cost the most?
Planting before grading risks losing both the plants and the installation labor. Building without a whole-yard plan can block the next phase. Starting too many projects leaves bare ground and new plants competing for your time and remaining cash.
Don't accept a verbal promise that a trench will solve the water problem. Get the route, destination, and restoration in writing. Photograph buried work, retain approvals, and check the finished yard in rain.
Skipping 811 or redirecting runoff onto another property can cause damage far beyond your planting budget. Complete the location and approval checks before excavation, even when the proposed job looks small.
FAQ
How much should I spend on landscaping a new house?
Build your budget from the site's necessary repairs and the features you'll use. The $30,000 example shows how to allocate a chosen total; it doesn't establish what your yard should cost. Price safety and drainage work first, then adjust optional construction and planting.
Can I plant in the first year?
Yes, where drainage, final grades, and construction access are settled. Your first year landscaping checklist should include utility location, mature plant spacing, regional timing, and a watering plan. Wait on any bed that will be excavated or driven over later.
Should I put in sod or seed first?
Choose one establishment method for each finished turf area. Use sod when quicker cover justifies its higher cost; use seed when you can wait and protect it. Both need prepared soil. Keep permanent turf out of future construction areas.
When is the best season to start?
Start observation and planning whenever you move in. Planting dates depend on region and species: Minnesota favors spring for many trees and late summer for lawn seeding; Arizona's low desert often favors fall for adapted woody plants, with frost-sensitive exceptions. Georgia warm-season lawns generally establish best in late spring or early summer. Check your county extension's calendar.
Do I need a plan if I do it myself?
Yes. A measured whole-yard sketch helps you preserve access and avoid conflicting projects. You can draw it yourself, then pay for technical help where drainage, boundaries, permits, or structures require it.