How to Inspect Landscaping Work Before You Pay
Learn how to inspect landscaping work before final payment, check drainage and paving, spot wall problems, and get unfinished items onto a written punch list.
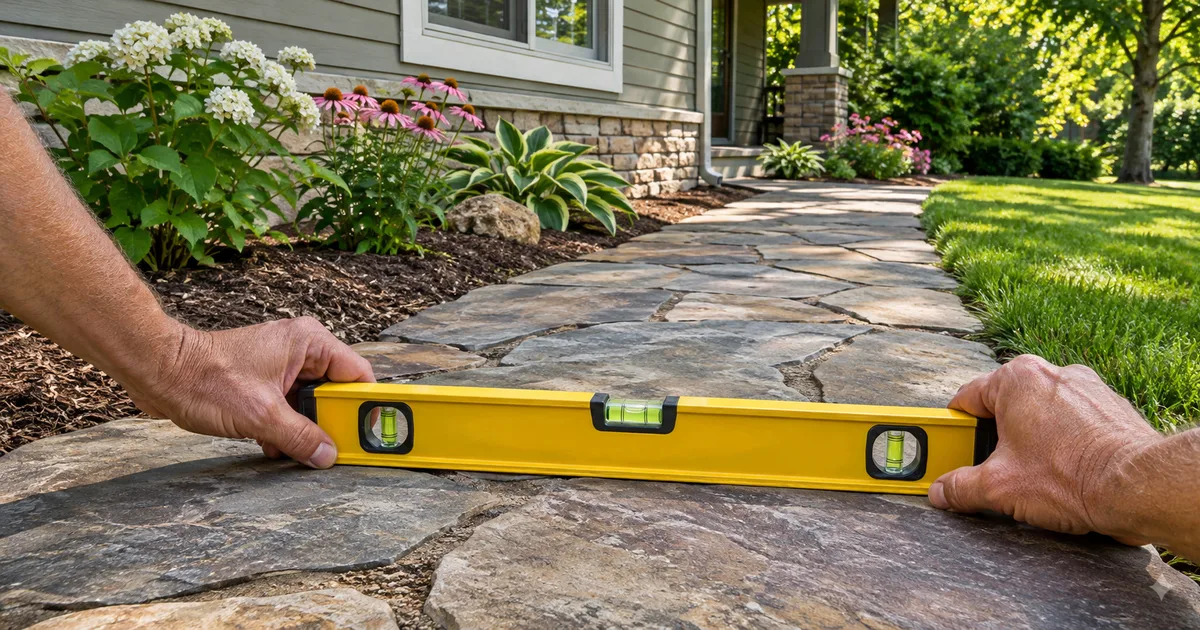
The crew is packing up, and the last invoice is on your kitchen table. Before you pay, walk the yard with the written scope and check where water goes, how the paving feels underfoot, and what still needs finishing. Learning how to inspect landscaping work starts with comparing the finished job to the agreement, then recording specific problems while the contractor can still show you how the work was built.
How to inspect landscaping work: when should you start?
Arrange a final walkthrough before the last payment comes due. Bring the contract, approved drawing, change orders, phone, tape measure, and a level or straight board. Ask the person responsible for the job to walk with you. An invoice marked “complete” doesn't answer questions about unfinished work.
Start earlier if construction is still underway. Inspect the prepared ground and compacted base before pavers or concrete cover them. Ask to see wall drainage and reinforcement before backfill hides them. The Concrete Masonry & Hardscapes Association, or CMHA, recommends checking construction at these underlying stages. Photos help preserve what was visible; they don't prove compaction or replace required inspections.
You asked for a path using your existing stone, but the crew spread it across the entire side yard. Compare the result with the agreed width, boundaries, material, and joints. If the stone couldn't cover the intended layout, the contractor should have offered a narrower path or priced additional material before proceeding. A sketch with dimensions makes that conversation easier to settle.
You supply clear requirements; the contractor confirms the layout and raises practical limits. The FTC recommends putting scope and material promises in the contract. University of Georgia Extension also distinguishes a concept plan from a detailed construction plan. An attractive sketch may still need construction details. If you're planning another phase, read where to start landscaping a new house and compare landscape designer costs before requesting drawings.
What should you check first: grade and drainage?
Start beside the house before you get distracted by the new patio or planting beds.
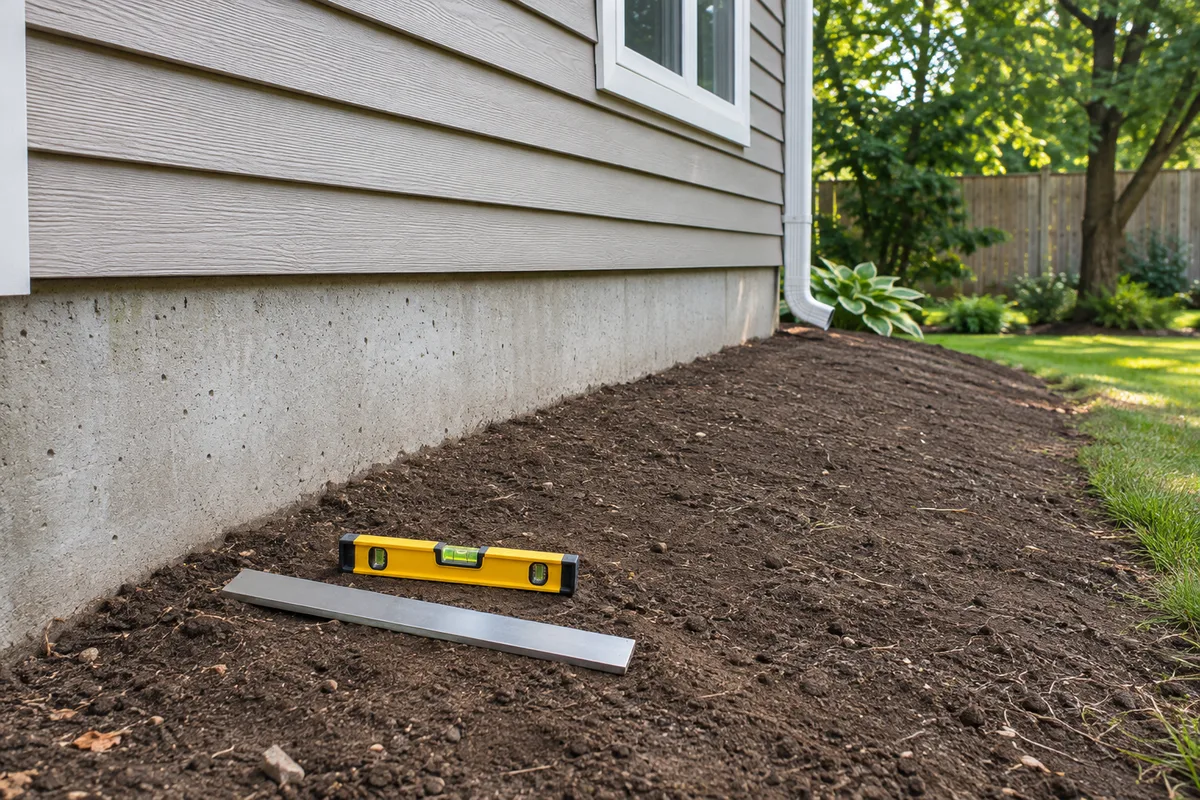
A patio can look tidy while directing runoff toward a basement window. To check grading, follow the intended water route from the foundation to its outlet, looking for reverse slopes, depressions, and raised borders that trap water.
IRC Section R401.3 calls for ground to fall at least 6 inches within the first 10 feet away from foundation walls. Where physical barriers prevent that fall, drainage needs an approved alternative such as drains or swales. Maricopa County's published code guidance also specifies a minimum 2% slope away for impervious surfaces within 10 feet. Confirm the locally adopted code and amendments; ground and paved surfaces have different requirements.
Measure clearance below siding, window sills, and openings. MyBuildingPermit's residential inspection checklist, referencing IRC R317.1, specifies 6 inches between ground and wood siding. That isn't a universal clearance for every wall material: decay-resistant materials, siding instructions, and local provisions affect the detail. Soil, mulch, or gravel covering siding or reaching a window sill needs correction or a documented compliant detail. Raising the yard against the wall isn't an acceptable shortcut to better drainage.
Watch the yard during rain if possible. Mississippi State University Extension recommends rainfall observation to identify drainageways and pooling. Photograph the route, the low spots, and the outlet. A smooth draining surface can include intentional swales; the whole yard doesn't need one flat plane.
If there's a new drain, ask the installer to demonstrate flow from its inlet to the intended outlet with a hose, once materials can safely get wet. Drain Designs uses hose testing on installed lines. This checks basic flow, not storm capacity or buried-pipe integrity. For wider drainage problems, review backyard drainage before accepting a proposed repair.
Check where the water goes before you approve how the yard looks.
How do you check pavers, flagstone, patios, and paths?
Walk the normal route once the installer says it's ready for use. Notice toe catches, rocking stones, awkward turns, and exposed edging. Roll an empty wheelbarrow along an intended garden access route if appropriate. That can reveal an awkward transition, but it isn't a load test or proof of accessibility compliance.
Use this table to turn concerns about landscaper work quality into questions the contractor can answer.
| Check | What to flag | What to ask |
|---|---|---|
| Surface and joints | Rocking pieces, abrupt lips, or inconsistent joints | Does the installation meet the specified paving system's tolerances? |
| Edges and transitions | Exposed metal, loose perimeter pieces, or an unexpected raised end | How will this walking transition be finished safely? |
| Steps and utilities | Uneven step geometry, buried lids, or a cover that catches your foot | Can you demonstrate safe use and access to every service box? |
| Drainage | Local depressions or water trapped behind edging | Where is this surface designed to discharge? |
A valve box in a path isn't automatically a violation. NDS specifies flush installation and pedestrian load ratings for its standard valve boxes; other products have different ratings. Check the installed cover and access. Ask the contractor to resolve an unsafe location or transition rather than burying it.
Lay a straight board across suspect depressions and compare neighboring edges. CMHA's interlocking-paver guidance addresses surface tolerances and consistent joints. Natural flagstone has different textures and installation details, so don't apply a concrete-paver tolerance to every stone. Small cuts aren't automatically defective either; flag pieces that rock, lack support, or leave an unsafe edge.
Ask for the base material and compacted depth, with progress photos or testing records. CMHA recommends at least 4 inches of compacted aggregate base for conventional pedestrian pavers over well-drained soil, with thicker bases needed in adverse conditions. That figure doesn't specify every flagstone, permeable-paver, or concrete installation. A finished surface won't reveal whether the base meets the design.
What does bouncy or soft ground under a patio mean?
A machine crosses the excavated area, and the ground ripples around its tracks. Wet fine-grained soil can yield under repeated loading, sometimes described as pumping. Fresh fill and poor drainage can contribute. The movement alone doesn't identify its cause or prove an underground leak.
Persistent wetness in dry weather also warrants checking irrigation leaks or nearby septic components. EPA identifies spongy soil around a drainfield without recent rain as a warning of septic failure. Have that assessed before treating it as an ordinary base problem.
Ask the crew to stop repeated traffic and assess the exposed ground before covering it. Federal Highway Administration guidance explains that wet subgrade may not support construction traffic and that drainage and moisture adjustment can be necessary before compaction. Drying helps when excess moisture is the problem. Persistent softness needs further investigation.
A common tip is to compact everything when it's completely dry. Compaction actually depends on suitable moisture for the soil and equipment. FHWA recommends working near the material's optimum moisture content. A sunny day alone doesn't establish readiness.
For concrete, ask what the slab was poured on and how soft spots were treated. The National Ready Mixed Concrete Association's CIP 4 calls for removing topsoil and soft spots and providing well-compacted support. The American Concrete Pavement Association likewise warns that putting aggregate over soft areas doesn't create uniform support. Ask for a written repair proposal if the ground remained unstable.
Replacement and recompaction can add excavation and disposal costs. Any alternative that relies on a slab spanning weak ground needs an engineer's design. Don't accept a thinner repair simply because it's cheaper without understanding its limits. If the patio is already poured, appearance alone can't establish the condition underneath, and a crack alone doesn't identify the cause.
A smooth patio surface can't show you whether the soil underneath was firm.
Is a leaning retaining wall normal?
A consistent lean back into the retained soil can be intentional. Segmental block systems often use a setback, called batter, as successive courses rise. Compare it with the manufacturer's detail and approved design. Don't demand that every wall be rebuilt perfectly vertical.
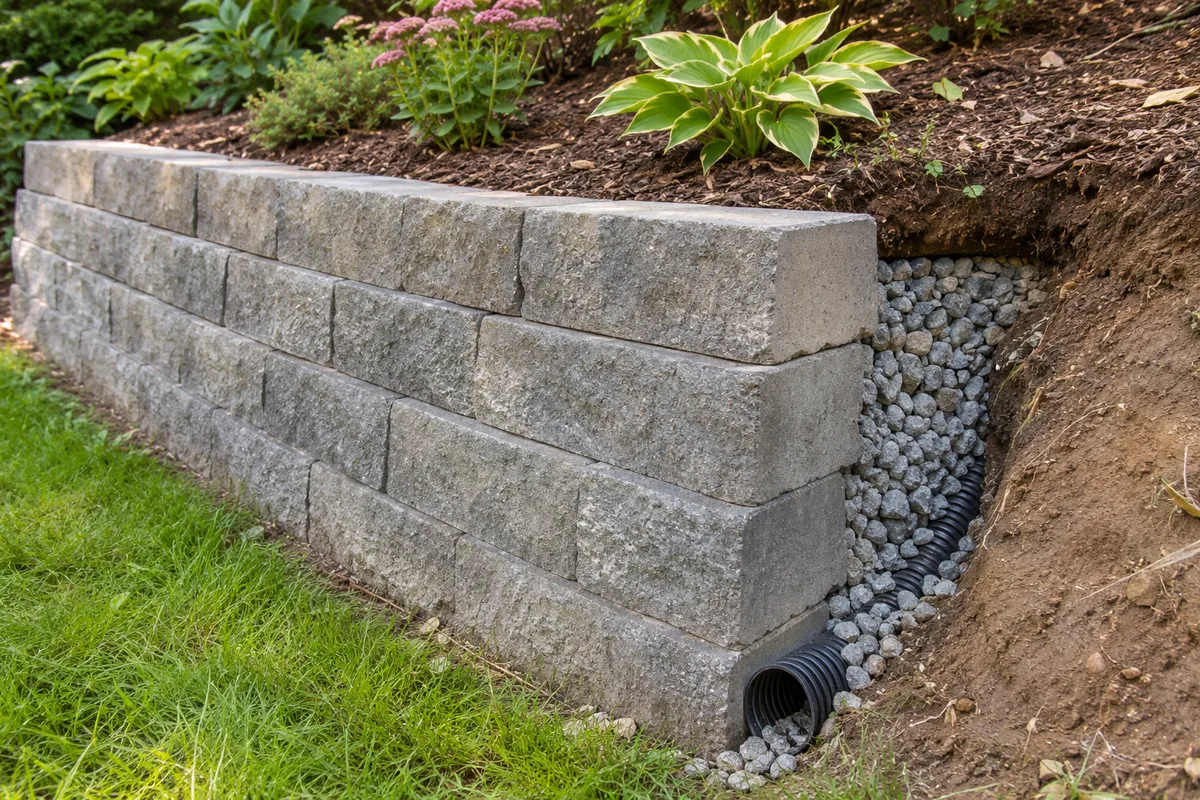
An outward lean, bulge, displaced blocks, or new movement needs professional assessment. Allan Block's maintenance guidance calls for a contractor or qualified engineer when significant forward movement or rotation appears. Photograph the wall from repeatable viewpoints. Keep people away from an area that appears unstable, and don't excavate behind it to investigate.
During a retaining wall inspection, ask the contractor to identify the drainage stone, pipe, outlet, and surface-water route. Construction photos are useful when those parts are hidden. Allan Block specifies wall rock and toe drains for applicable installations, but warns that these handle incidental water. They aren't a substitute for managing runoff or groundwater around the wall.
Look for a clear outlet or the documented connection. Some designs use weep openings; others route drainage through pipe outlets. Don't judge every wall by whether it has visible holes, and don't assume gravel proves that drainage works.
Check permits with the city or county building department through its official website. Give the address, wall dimensions, nearby slopes, and loads such as a driveway. Portland requires a permit for walls over 4 feet, measured from the bottom of the footing to the top, or walls supporting a surcharge. It also requires engineering for walls over that height. Your jurisdiction may differ, and buried footing depth counts in that example.
“Under four feet means no permit” is unreliable advice. Ask which rule applies and request inspection records where required. For the budget implications of a proposed rebuild, see retaining wall cost.
How do you check plants, sod, and irrigation?
Match plants to the agreed list and invoice by species, cultivar where specified, supplied size, and count. Record substitutions that lack your approval.
A healthy-looking smaller plant still doesn't match the larger size you agreed to buy.
At trees, look for the root flare, where the trunk widens into roots near the soil surface. University of New Hampshire Extension recommends roughly 2–3 inches of mulch and warns against piling it against trunks. Check total depth, including old mulch beneath the new layer. These are general planting checks; drainage and the particular plant can require different details.
Sod edges should meet tightly without overlapping, with good soil contact. Penn State Extension emphasizes snug seams and irrigation during establishment. Ask for watering instructions suited to the grass, season, and soil, plus written responsibility for establishment care and any replacement coverage.
Have the installer run every irrigation zone. EPA WaterSense recommends checking zones for damaged or tilted heads, leaks, and misdirected spray. Watch for geysers, dry areas, and water hitting the house. Check valve-box connections too. A brief demonstration can find obvious faults, but it doesn't certify pressure, backflow protection, or uniform watering.
How do you write a landscaping punch list and decide when to pay?
Write the landscaping punch list while you walk. For each item, record its location, the observed problem, the matching contract requirement or requested assessment, and a photo number. Add the walkthrough date and ask for a written response with a completion date.
For example: “Gate entrance: the end of the metal edging projects above the walking surface. Photo B. Please propose a safe transition and confirm the repair date.” That gives the contractor something specific to inspect. “Poor landscaping workmanship throughout” leaves too much room for disagreement.
Email the list and retain the photos and reply. Follow the contract's formal notice procedure as well. California's Contractors State License Board recommends keeping project documents and photographs and tying payment stages to work. Its guidance is state-specific, so check your own regulator's requirements.
The FTC advises waiting until work is complete and satisfactory before final payment. Apply that through your agreement: identify unfinished items, request corrections, and agree in writing on any lawful holdback and release conditions. Don't invent a withholding percentage or retain more than the contract and applicable law permit. Get local legal advice before a disputed payment becomes overdue.
CSLB warns that unpaid subcontractors or suppliers may have lien rights even after the main contractor is paid. Ask about the releases appropriate to your state and payment stage. A contractor's verbal assurance isn't equivalent to a claimant's signed release.
Before closeout, request agreed leftover stone or pavers for repairs, material names, care instructions, warranties, and permit records. Leftovers aren't automatically yours if the agreement says otherwise. Revisit landscaping quote red flags for scope and payment terms. Refusal to discuss a walkthrough or specific defects is reason to document the dispute promptly.
Record each unfinished item before you agree that the job is complete.
FAQ
How long do I have to report landscaping defects?
Report them as soon as you discover them, following the contract's notice procedure. Warranty periods, agency complaint deadlines, and legal filing deadlines are different. CSLB has defined enforcement time limits; those don't establish your state's deadline or extend a private warranty. Keep dated evidence and seek local advice promptly if repairs are refused.
Can I withhold payment for unfinished landscaping?
You may have grounds to dispute payment, but the contract and state law control what you can retain and when. Identify the disputed work in writing and seek agreement on correction and payment. The FTC's advice to wait for satisfactory completion doesn't create an unlimited right to withhold money or prevent a lien claim.
Should I hire an inspector or an engineer?
Use an independent hardscape specialist for an installation review. For wall movement, unstable slopes, or suspected bearing problems, seek a licensed engineer with relevant structural or geotechnical experience. Ask what the review includes and whether testing or opening finished work is needed. A visual walkthrough can't certify hidden construction.
What if the contractor built what I asked for, but it works badly?
Separate a changed preference from a performance problem. A layout matching your drawing may need a paid change if you now want something different. Water flowing toward the house still needs assessment against drainage requirements. Ask which constraints were identified before construction, then seek a written repair or change proposal. A vague scope complicates responsibility; it doesn't settle it.
How much slope away from a house is right?
The IRC ground-grading benchmark is 6 inches of fall within the first 10 feet, where conditions allow. Paving and constrained sites have separate provisions. Ask the local building department which adopted rule applies to your surface and approved drainage plan before accepting a proposed grade correction.